Introduction
In this tutorial a simple image classifier will be created using Python and the fast.ai package. This example is based on chapter 2 in the fastai book, part of the course Practical Deep Learning for Coders.
Eyewear classifier
In this tutorial we will create a classifier that can identify what eyewear people are wearing, in the categories: glasses, sunglasses, VR headset or none.
Though this might not be a very helpful application, image classifiers play a key role in e.g. systems for autonomous driving, by classifying objects on the road, identifying if someone are distracted etc. For overview of an application of computer vision in self-driving cars, see this presentation by Drago Anguelov of Waymo. Other use cases of image classification includes assessing the health of coral reefs or medical image analysis and more.
Notebook server
For this tutorial, I used a free GPU tier instance available at Gradient Paperspace, configured for fastai. This was one of the services recommended in Practical Deep Learning for Coders along with Google Colab or Amazon SageMaker.
As an aside, when I tried to run the code on my own computer (sporting a good ol’ GTX 1080), I found it to be much slower (by a factor 5-20 using the GPU), and the installation process to be much more involved. Without going into too much detail , I note that using a service such as Gradient Paperspace was worth it regarding performance/setup time.
Building the classifier
Import the fastai libraries
Import necessary libraries from fastbook. This will also import a lot of other things, such as os.path, which we will need later.
from fastbook import *
from fastai.vision.widgets import * # needed for e.g. cleaner
Download training/validation images
Bing image downloader
The classifier we want to create should be able to discern between people wearing glasses, sunglasses, VR headset, or no eyewear. For this we need labelled images to train our classifier on. To obtain this I used the bing_image_downloader which can be installed with the Python package manger pip. After its installed, import the downloader.
from bing_image_downloader import downloader
Define search queries
Save queries for the image search as a dictionary. The dictionary-key is a shorthand for the search-string (will be used as the folder name), and the dictionary-value is the search-string sent to Bing.
To get similar images, I added the term (man OR woman) to the search queries, to only include images containing real persons, and portrait to get a similar camera-angle across images. Finally, save the name of the download directory.
query_dict = {"glasses":"(man OR woman) portrait glasses",
              "sunglasses":"(man OR woman) portrait sunglasses",
              "VR":"(man OR woman) portrait VR headset",
              "none":"(man OR woman) portrait NOT glasses NOT sunglasses NOT 'VR headset'"}
download_dir = "portrait2"
Download images
Now, download all images and move them to the directory defined above, and rename them such that each filename indicates the category (glasses, sunglasses, etc…).
for shorthand, query in query_dict.items():
    print("Downloading images... Query:", query)
    downloader.download(query, limit=150, images/cv_fastai/cv_fastai/output_dir=download_dir , adult_filter_off=True, force_replace=False, timeout=5)
    # bing_image_downloader will save everything in a subfolder with same name as the query
    temp_path = Path(os.path.join(download_dir, query))
    new_subdir = download_dir + "/" + shorthand
    shutil.rmtree(new_subdir, ignore_errors=True) # clear folder
    temp_path.rename(new_subdir) # rename default save path
    for f in get_image_files(new_subdir):
        # rename files, replacing 'Image' in the name with the shorthand for the query
        new_name = str(f).replace("Image", shorthand)
        shutil.move(str(f), new_name)
Save image labels
Extract the labels from the dictionary and save them in the list eyewear_types.
eyewear_types = [key for key, value in query_dict.items()]
print(eyewear_types)
['glasses', 'sunglasses', 'VR', 'none']
Verify images
Get a list of the path to all downloaded images.
path = Path(download_dir)
fns = get_image_files(path)
fns
(#600) [Path('portrait2/glasses/glasses_3.jpg'),Path('portrait2/glasses/glasses_4.jpg'),Path('portrait2/glasses/glasses_5.jpg'),Path('portrait2/glasses/glasses_7.jpg'),Path('portrait2/glasses/glasses_8.jpg'),Path('portrait2/glasses/glasses_9.jpg'),Path('portrait2/glasses/glasses_11.jpg'),Path('portrait2/glasses/glasses_12.jpg'),Path('portrait2/glasses/glasses_13.jpg'),Path('portrait2/glasses/glasses_15.jpg')...]
Check for errors/corrupted files in the images.
failed = verify_images(fns)
failed
(#0) []
Remove corrupted files if any.
failed.map(Path.unlink)
(#0) []
Load the data into fastai
Create a DataBlock and dataloaders
To load the data into fastai, we use the construct DataBlock. For this, we need to specify that the first data type is Images (ImageBlock) and the seconddata type, in this case the target we want to predict, is a category (CategoryBlock).
To provide a way for the DataBlock to retrieve the data, we send the function get_image_files to the argument get_items. Also, we specify get_y=parent_label, meaning that the value of the y variable (target) is taken from the parent folder the file reside in.
The data is split into training/validation by the RandomSplitter, which we set to split the dataset into 20% validation and 80% training data. Finally, we also resize each image to the same size with item_tfms=Resize(128).
eyewear = DataBlock(
    blocks=(ImageBlock, CategoryBlock),
    get_items=get_image_files,
    splitter=RandomSplitter(valid_pct=0.2, seed=1001),
    get_y=parent_label,
    item_tfms=Resize(128))
By calling the dataloaders object of our eyewear object with the path to our image files, we get the dataloaders object in fast.ai, able to retrieve the data as specified above.
dls = eyewear.dataloaders(path)
Now we can check some of the validation images by calling show_batch(), which shows us the images Bing found for us. Luckily, each image seem to be SFW.
dls.valid.show_batch(max_n=4, nrows=1)

Data Augmentation
A common technique to improve image recognition and make the classifier more robust to images taken at different angles, lighting conditions, etc, is to augment the data by various transformations, such as rotating, shifting or scaling the image. This can be done by setting the batch_tfms keyword in the DataBlock to use aug_transforms.
Create a new dataloaders from the eyewear, adding the aug_transforms.
eyewear = eyewear.new(item_tfms=Resize(128), batch_tfms=aug_transforms(mult=2))
dls = eyewear.dataloaders(path)
Now, we can show a sample of the augmented images in the training data.
dls.train.show_batch(max_n=8, nrows=2, unique=True)

As we resize each image to square images with the same size, there is the issue of how to crop or scale the image to fit into the new frame. To further augment the data we can use RandomResizedCrop() instead of just Resize(), which randomly resizes and crops the image to fit into a square with the specified size. This helps to introduce more variation in our training data.
eyewear = eyewear.new(
    item_tfms=RandomResizedCrop(224, min_scale=0.5),
    batch_tfms=aug_transforms())
dls = eyewear.dataloaders(path)
Training the model
We use the pre-trained resnet18 network available in fastai, which in turn is provided by torchvision. Since we use a pre-trained network we train using fine_tune, which freezes the weights and only updates the head, the final output layer of the network, to match the image labels.
learn = cnn_learner(dls, resnet18, metrics=error_rate)
learn.fine_tune(7)
| epoch | train_loss | valid_loss | error_rate | time |
|---|---|---|---|---|
| 0 | 2.249737 | 1.427885 | 0.458333 | 00:13 |
| epoch | train_loss | valid_loss | error_rate | time |
|---|---|---|---|---|
| 0 | 1.065863 | 0.813837 | 0.325000 | 00:15 |
| 1 | 0.953014 | 0.630795 | 0.225000 | 00:13 |
| 2 | 0.787645 | 0.570360 | 0.183333 | 00:13 |
| 3 | 0.629217 | 0.546598 | 0.158333 | 00:15 |
| 4 | 0.530978 | 0.553771 | 0.183333 | 00:14 |
| 5 | 0.456086 | 0.553313 | 0.175000 | 00:13 |
| 6 | 0.415451 | 0.545426 | 0.150000 | 00:14 |
Misclassifications
In the training above the error rate is around 15%, which is quite high. We plot the confusion matrix to get an overview of which images where misclassified.
interp = ClassificationInterpretation.from_learner(learn)
interp.plot_confusion_matrix()
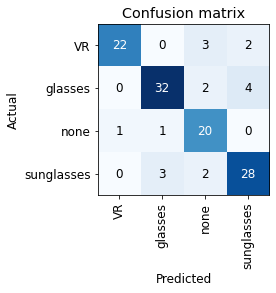
It could be that some of the images are mislabeled, as they are just downloaded from Bing with a simple search query.
To investigate this, we plot the images with the top losses, to see where the network made the wrong prediction.
interp.plot_top_losses(8, nrows=2)
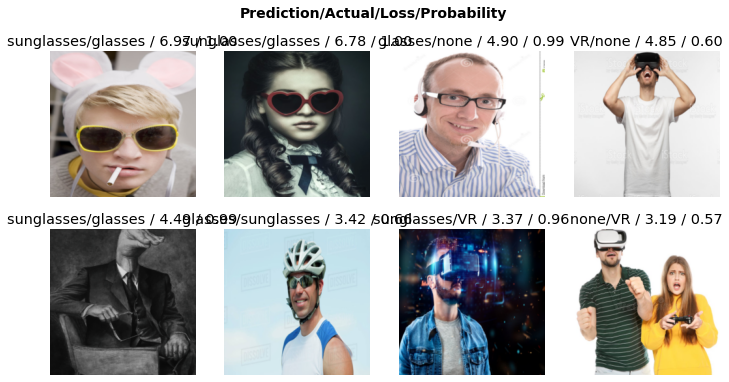
Again, when you download images from Bing like this you could get anything, but it looks like were on the safe side of the tracks here.
Data cleaning
In the images above, several images of the classifier were correctly identified, but was mislabeled, resulting in a misclassification. Such as the first image of someone wearing sunglasses but wrongly labelled as glasses. There are also an image with two people, one wearing a VR headset and one without, and a modified image with a person that has a hand for a face.
Fixing the labels and e.g. only keeping images showing one person with a real face is likely to improve the model performance and error rate. Fastai provides a tool which allows us to re-classify or remove images from the dataset, sorting images according to the error (loss) made by the network in the image classification.
cleaner = ImageClassifierCleaner(learn)
You can run the cleaner to investigate the training/validation images for the different categories, marking images for removal or re-classification.
cleaner
Once done, we can remove and reclassify marked images from above, if neeeded.
'''
for idx in cleaner.delete():
    print(str(cleaner.fns[idx]))
    cleaner.fns[idx].unlink()
for idx,cat in cleaner.change():
    print(str(cleaner.fns[idx]))
    print(path/cat)
    shutil.move(str(cleaner.fns[idx]), path/cat)
'''
Rinse and repeat
Now, we can redo the steps above from the training, to see if we get a better result. After cleaning the data I was able to get much better performance of the model. You could clean the data with the tool above/retrain, clean/retrain the data again, and so on, or just manually relabel everything. The final model should be able to have an error rate below 5%, if this is not the case we could try to change the network architecture from e.g. resnet18 to resnet34 (more layers and parameters), or fine-tune for more epochs,
Either way, assuming we have done the cleaning/training, and have a model we are happy with, we can deploy it online and provide a simple app for image classification.
Deploying the model
Save the model
Once we have trained a model, we can save it as pickle object for later use.
learn.export("eyewear-inf.pkl")
This creates the file eyewear-inf.pkl which contains the model and all its parameter values.
Creating the widget
Now, lets assume we only are given the pickled object above, and from this want to make a simple app for image classification. This can be done by importing the model, and then using e.g. Python widgets to create a simple user interface. The code from here on should be self-contained, assuming all dependencies are fulfilled (i.e. fastai).
Before we load the model, we first import the required libraries for fastai.
from fastai.vision.all import *
from fastai.vision.widgets import *
Then we load the classifier.
learn_inf = load_learner('eyewear-inf.pkl')
Now we have the model, and move on to create the user interface step-by-step. For this, create a Classify button.
btn_run = widgets.Button(description='Classify')
We also need a label to print the result from the classification, and an option for uploading files.
lbl_pred = widgets.Label()
btn_upload = widgets.FileUpload()
Next, create the frame where we will display these widgets.
out_pl = widgets.Output()
Now we define what happens when we click classify, which should be: retrieve the latest uploaded image, clear the output frame, display the image, run prediction and show result of the prediction.
def on_click_classify(change):
    img = PILImage.create(btn_upload.data[-1])
    out_pl.clear_images/cv_fastai/cv_fastai/output()
    with out_pl: display(img.to_thumb(128,128))
    pred,pred_idx,probs = learn_inf.predict(img)
    lbl_pred.value = f'Prediction: {pred}; Probability: {probs[pred_idx]:.04f}'
Then connect the function on_click_classify above to the Classify button.
btn_run.on_click(on_click_classify)
Arrange the final widget with Vbox, which vertically stacks elements and shows them on screen.
VBox([widgets.Label('Is the person wearing glasses/sunglasses or a VR headset?'),
      btn_upload, btn_run, out_pl, lbl_pred])
Let’s try our classifier.
It works! What’s left now is to deploy the app online.
Deploying your app on Heroku
Following the path in Practical Deep Learning for Coders , they describe different options for deployment. Here we will deploy the app to Heroku.
Details on setting up Heroku is available here.
The github for the code used for deployment is available at https://github.com/andre-larsson/pdlc-inference-eyewear and the Heroku app was uploaded to https://eyewear-detector.herokuapp.com/.
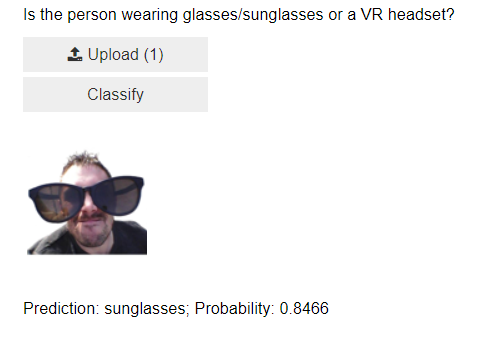
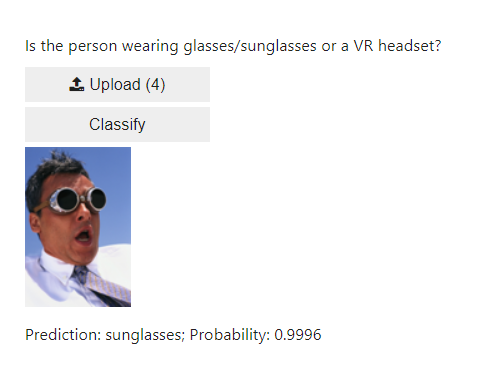
Here are some examples of the classifier classifying on what should be new, unseen, images.
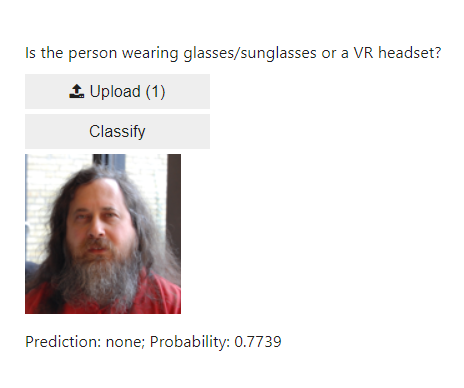
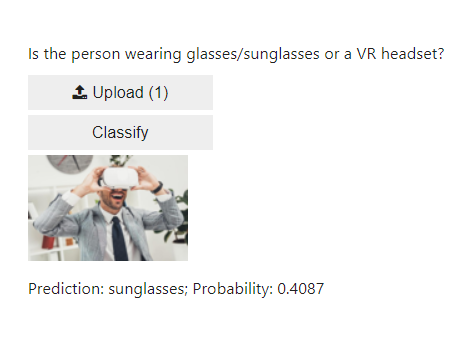
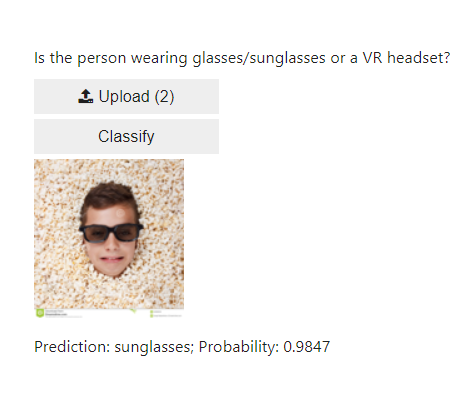
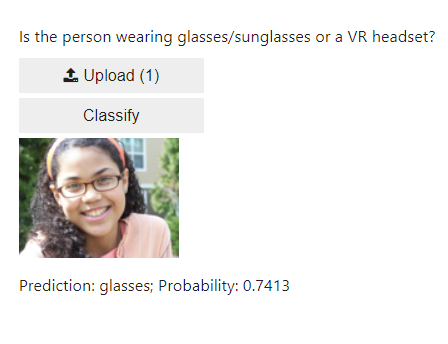
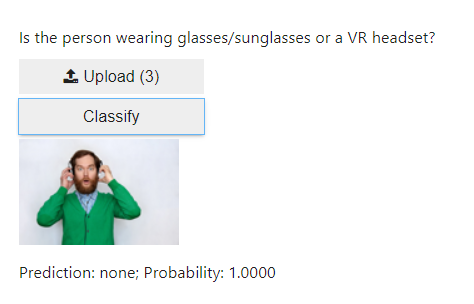
In this small test, the classifier guessed correct in 5 out of 6 cases, only mislabelling the man with the VR headset as having sunglasses.
Conclusion
In this tutorial we have learned to retrieve image data from Bing and train an image classifier with fastai. Everything was run on a notebook server at https://gradient.paperspace.com/.
After data cleaning and some more model training, the model was saved as a pickle object. The model was then loaded in another script for creating a more user-friendly widget, deployed at Heroku.
Links
https://gradient.paperspace.com/

